Over the course of 3 weeks, I split up responsibilities with my partner to design and assemble two novel chair designs.
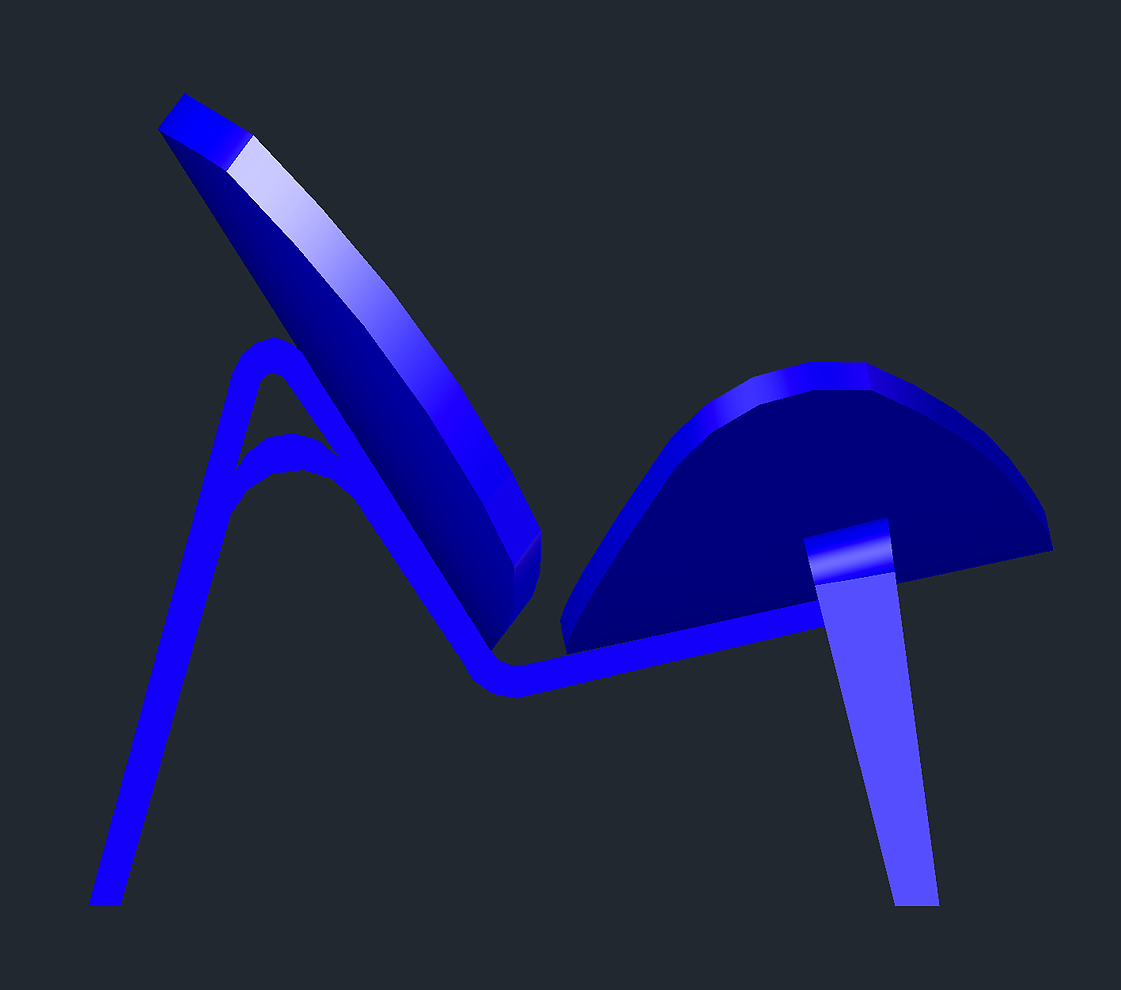
We began by looking to other chairs for inspiration. I measured other chairs, and looked into research on ergonomics for what makes a chair comfortable. I recreated the two chairs we were each inspired by (the smile chair and the halo chair) in AutoCAD and Rhino.
I was just learning how to use AutoCAD and Rhino in this class, and 3DS Max to render the final products, and it was exciting to learn new CAD software - especially surface modeling.
We 3d printed models of the chairs, and laser cut prototypes of the chair we designed. The prototypes were cut from Duron and made at 1/4 scale to validate assembly before cutting the more expensive OSB.
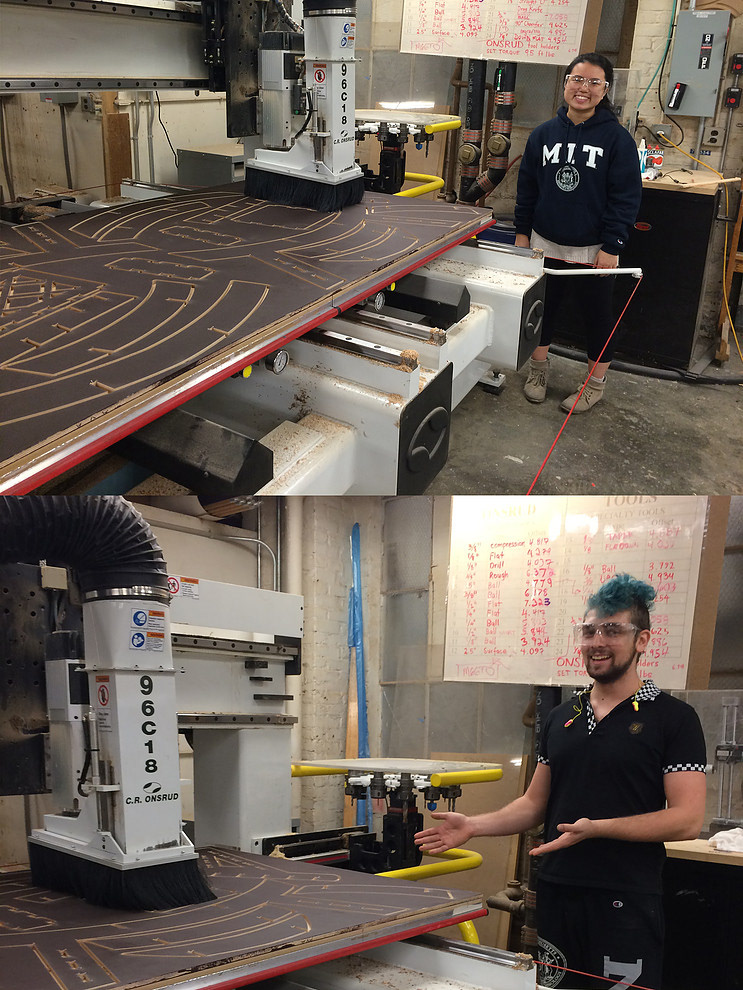
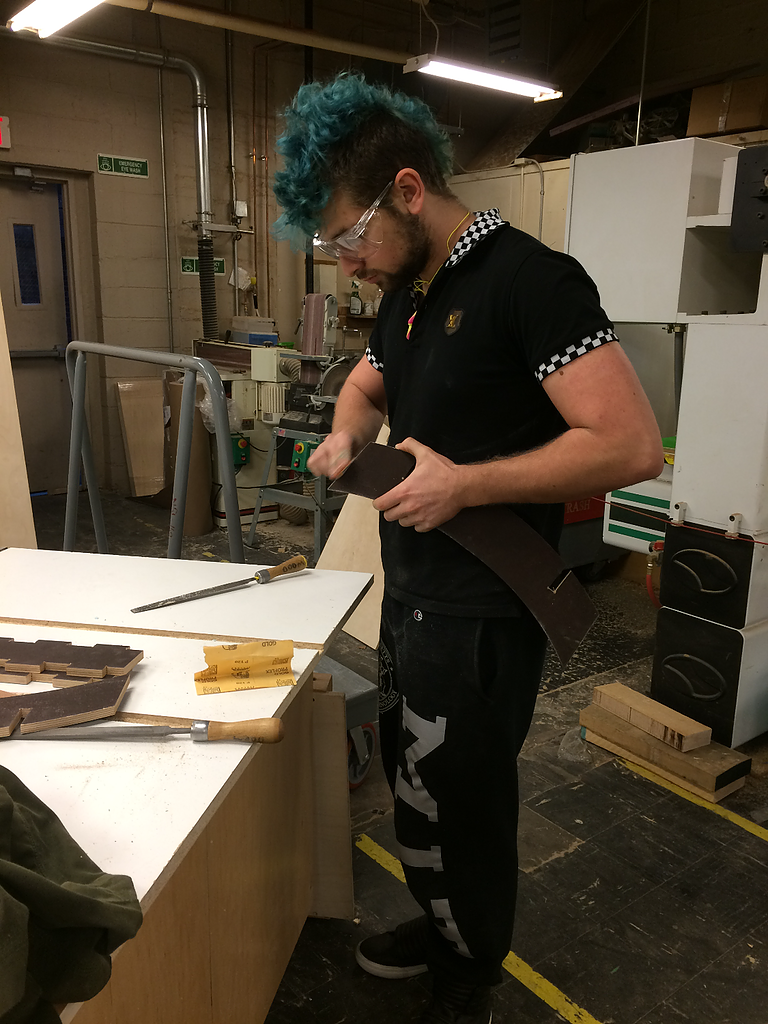
Finally we created G-code for the CNC router to cut out our pieces, painted the wood and hand assembled (and wood-worked last minute fixes).

Left: The Smile Chair, AutoCAD screenshot
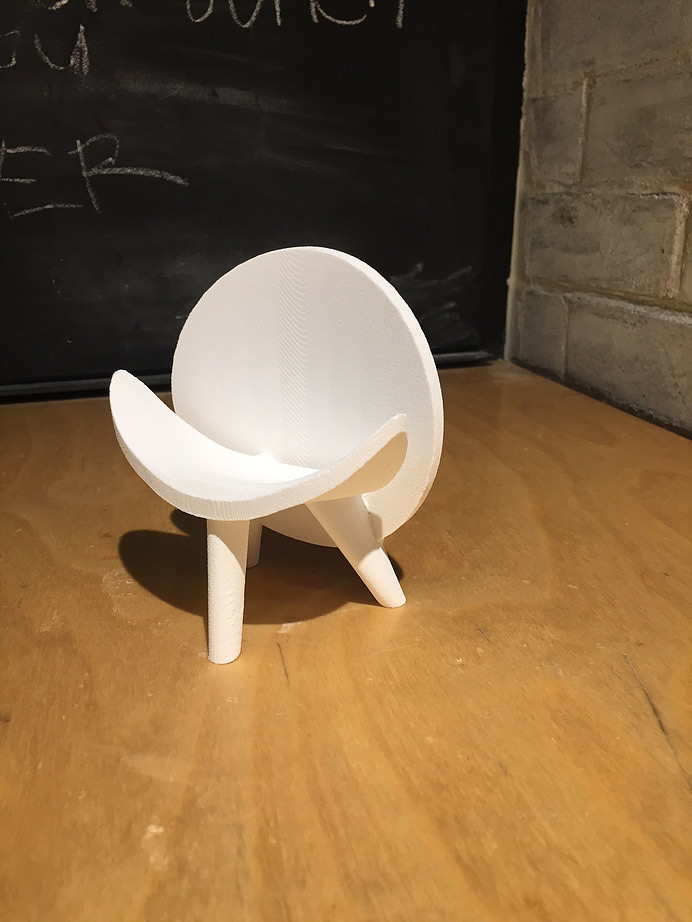
Right: The Halo Chair, 3D print of Rhino model
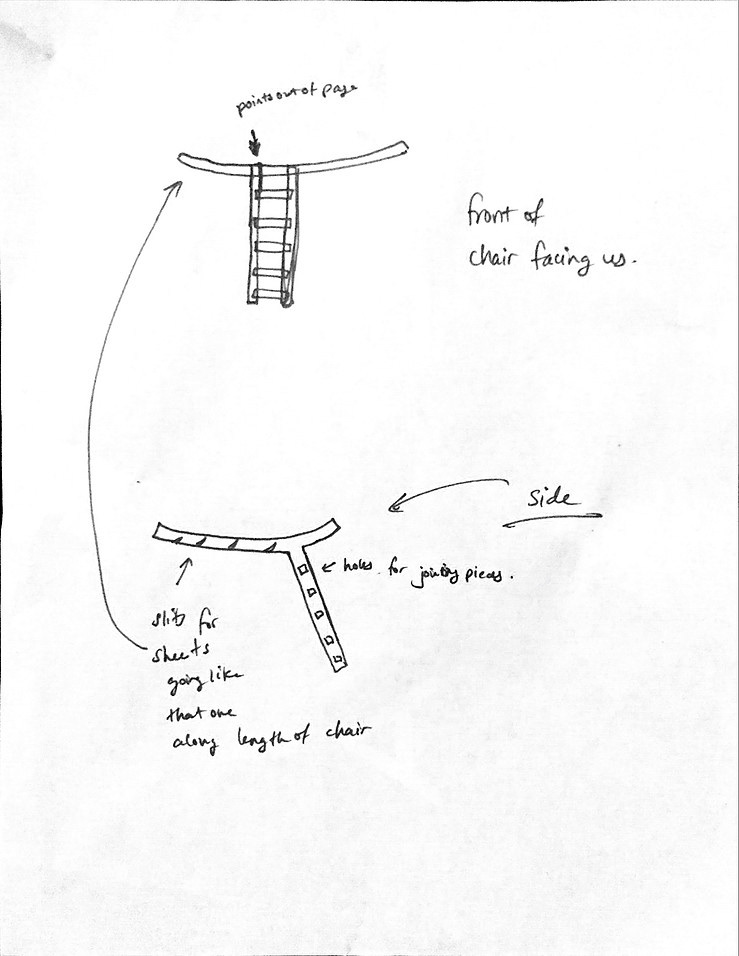
Pictures of the sketches I made for the attachment method of each piece, and between- pictures of the cut models and our different models of the leg and attachment grooves.
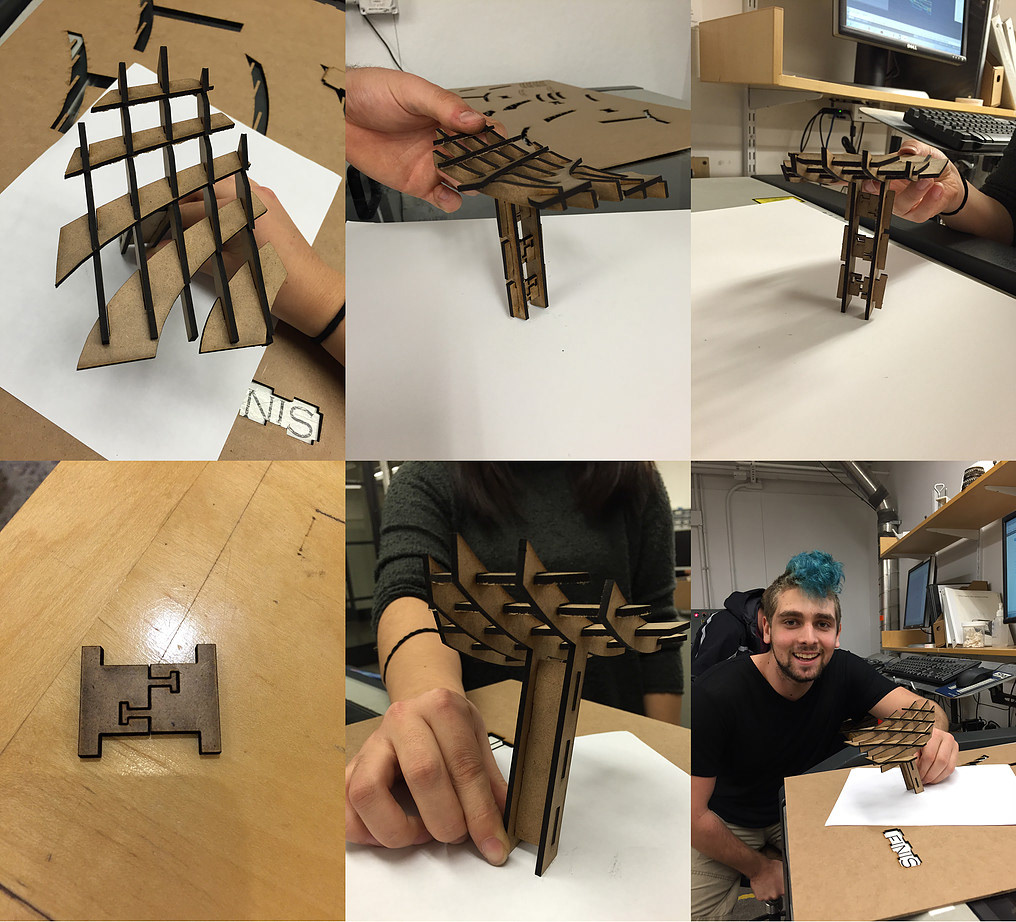

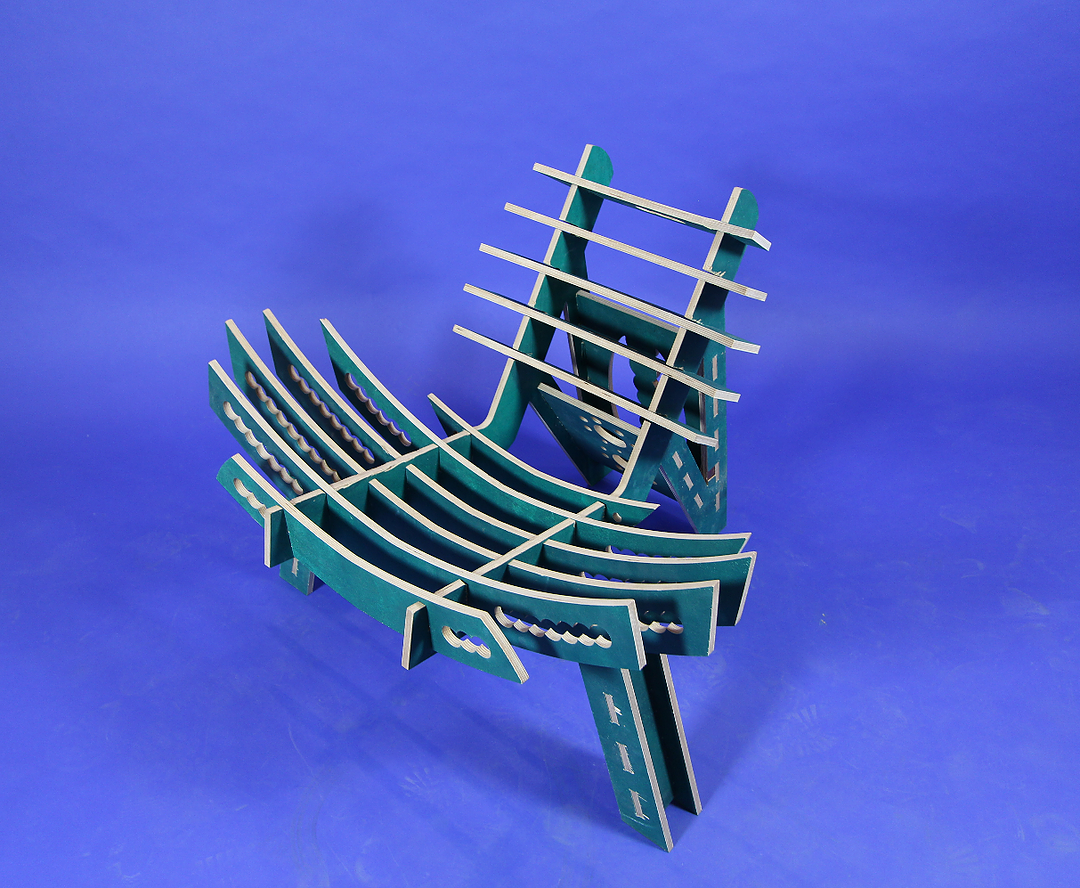
The final 1/4 scale model laser cut from Duron.

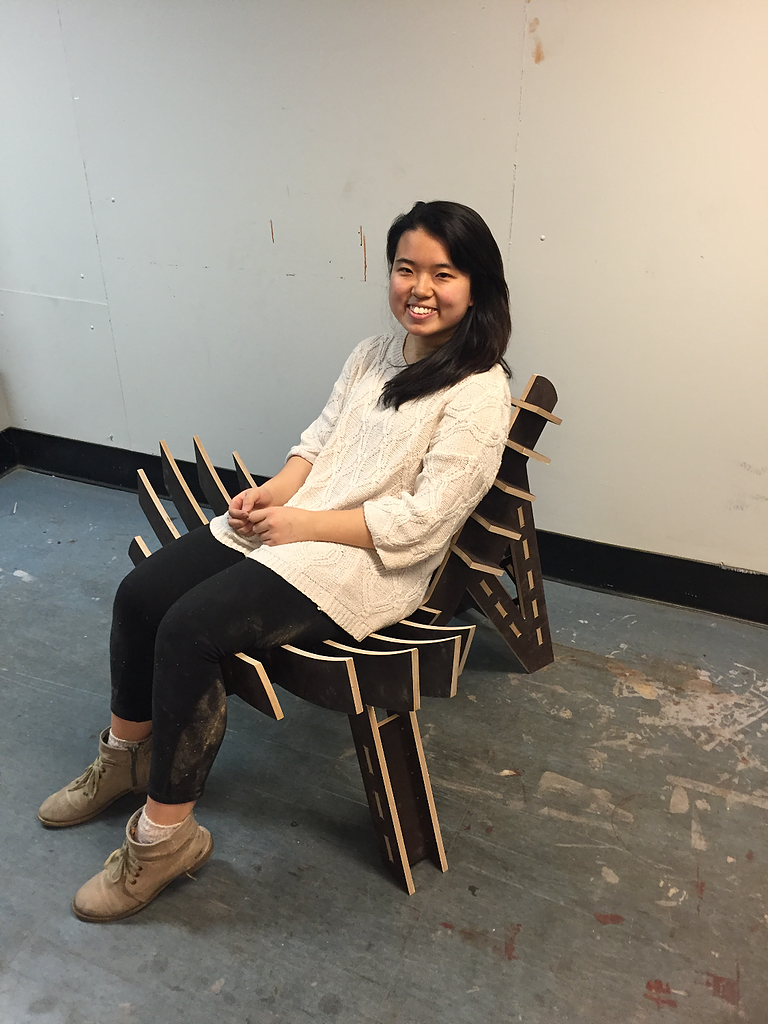
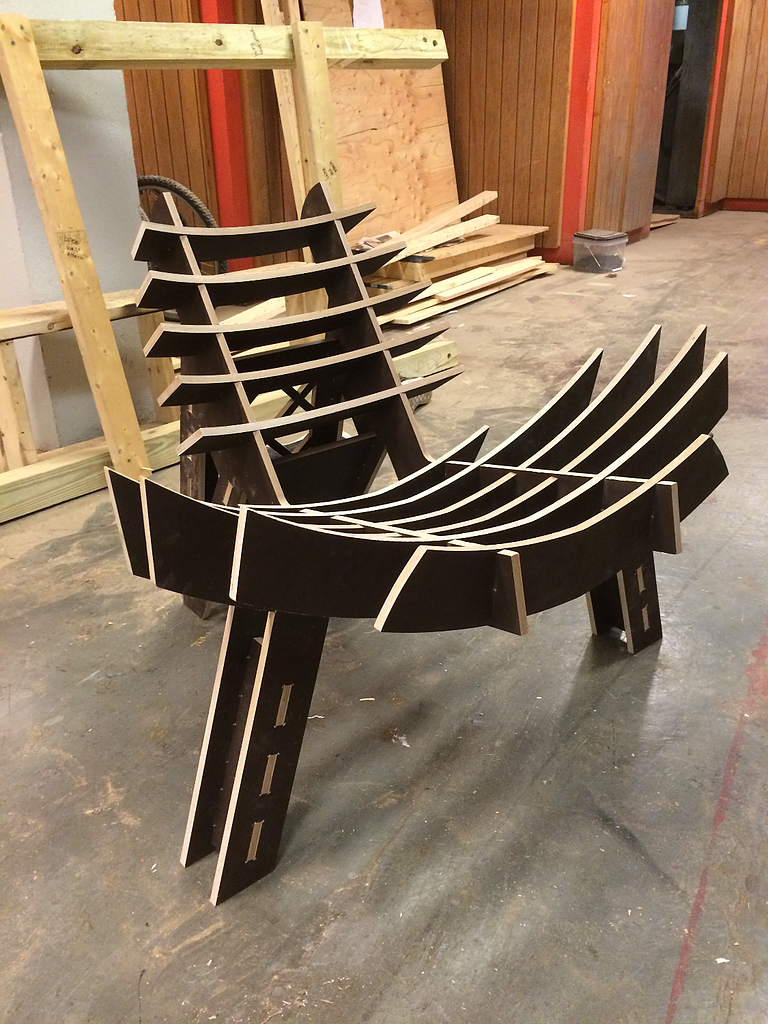
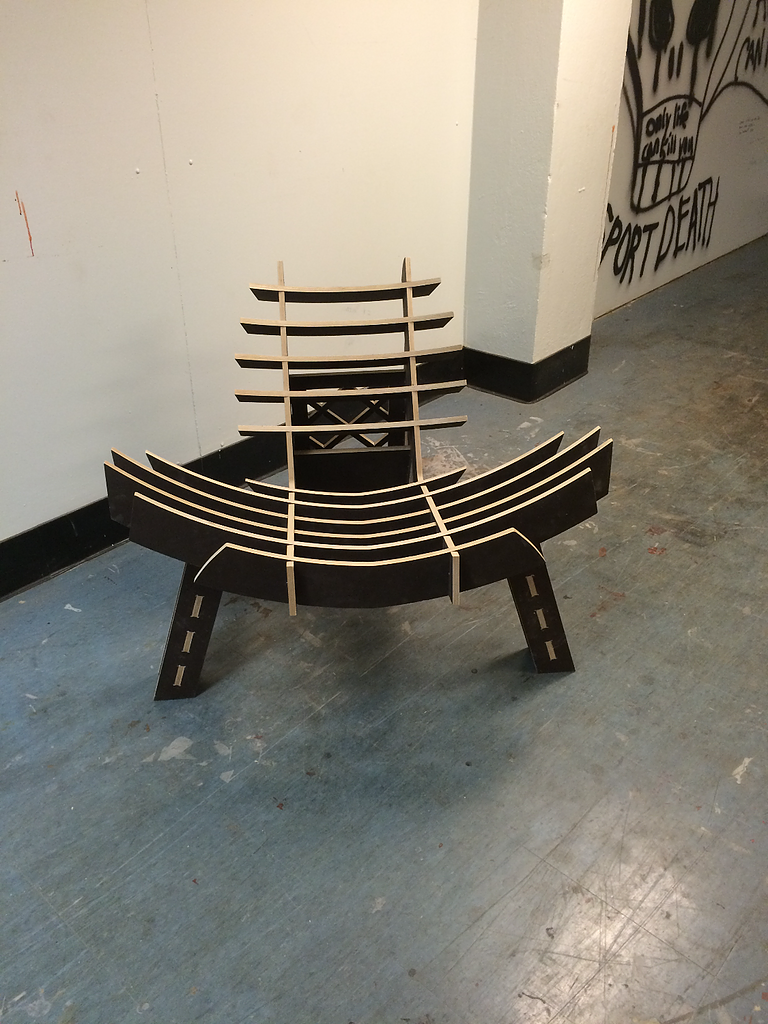
Pictures of us CNC'ing and hand sanding, and later taking to the basement machine shop to fix some mistakes in the tool-path. And the final chair!

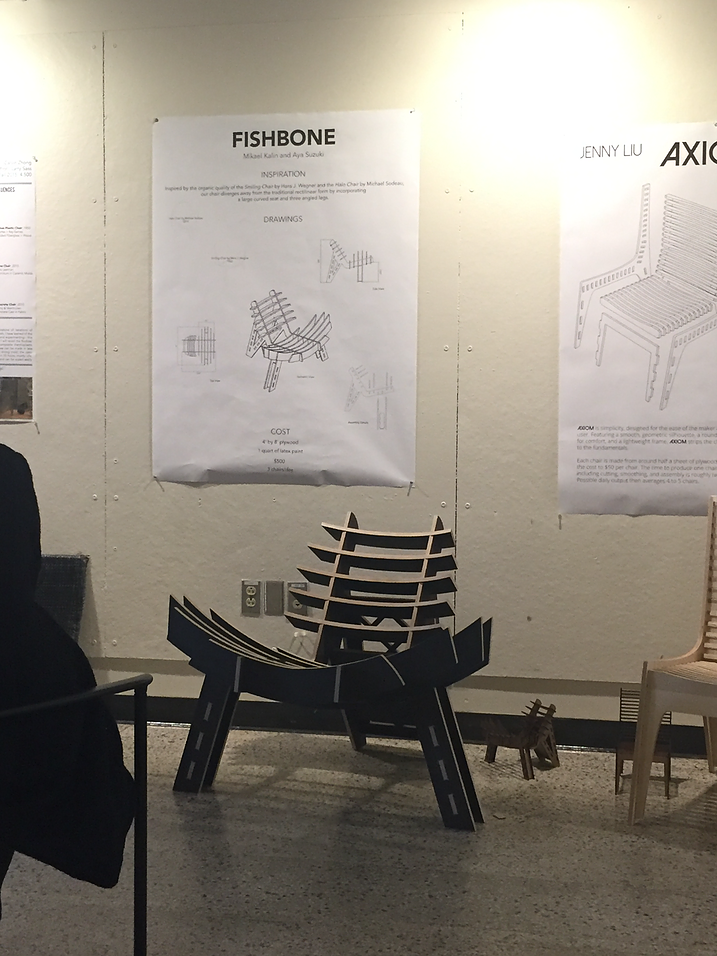
We made a poster to explain our chair and the inspiration as part of a final presentation. Here is a snap of the showcase, and a closer detail of the poster following.